
Switch and Customize Segments in ZONE
How to Switch Templates in ZONE: A Step-by-Step Guide
Welcome to the help and support document on How to switch and customize segments in ZONE. Let's dive in!
Step 1: Accessing the Settings Menu
To begin the process of switching segments in your templates, locate and click on the settings icon situated on the right-hand side of the screen. Upon clicking, a menu will appear, presenting you with various options.

Step 2: Navigating to Application Settings
From the menu that appears after clicking the settings icon, select "Application Settings." This will redirect you to a new window dedicated to managing templates, where you can make the desired changes.

Step 3: Adding Segments
Within the template management window, navigate to the dashboard and click on "Add Segment." This action will allow you to define the segments that will be associated with your templates. By adding segments, you can organize and categorize your templates based on specific business requirements or stages of your workflow.

Step 4: Selecting Desired Segments
In this step, carefully select the segments you wish to include in your template. Click on Continue and the desired template will be displayed into your account.

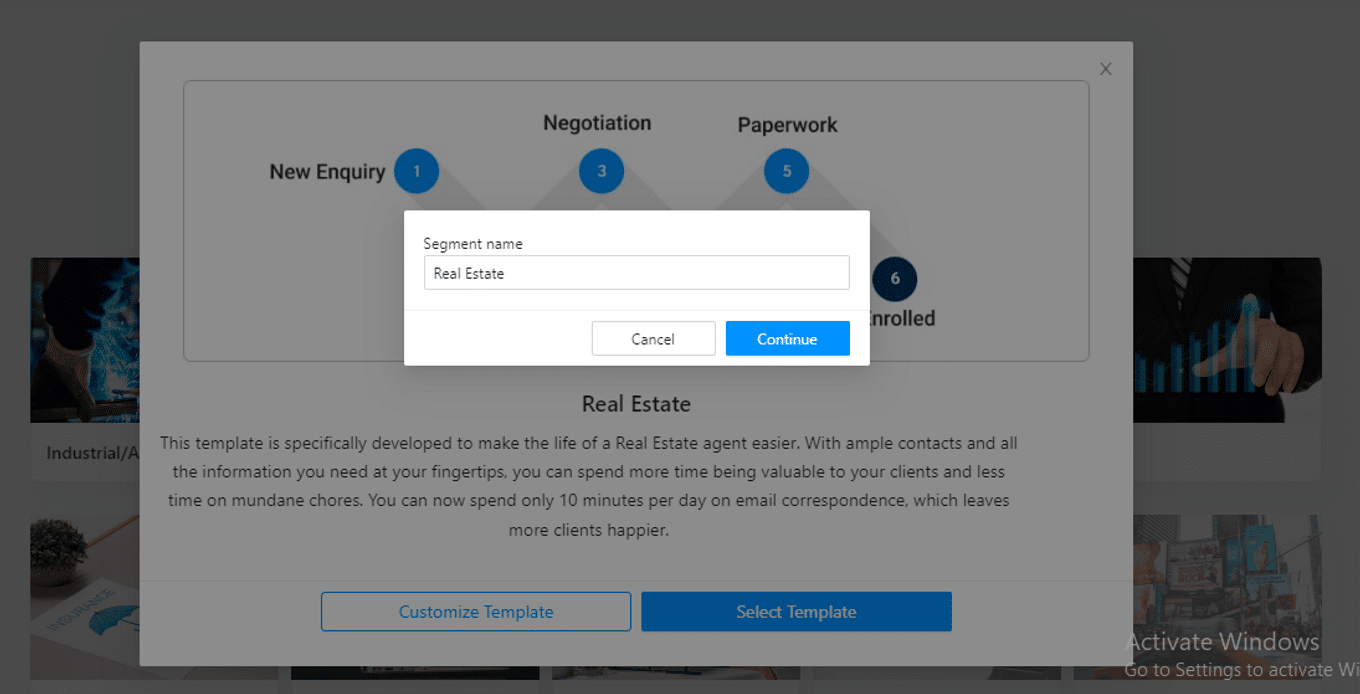
Step 5: Renaming and Finalizing the Template
Upon selecting the desired template or completing the necessary customization, a new window will open. In this window, you have the option to rename the template, giving it a unique name as per your business needs. Once you are satisfied with the changes made, click on the "Continue" button to update your account and apply the modified template.

Congratulations! By following these straightforward steps, you have successfully changed the segments in your ZONE templates, aligning them with your business needs.
How to Customize Segments in ZONE:: A Step-by-Step Guide
To further customize your segments within the ZONE templates, follow the steps outlined below. These steps will enable you to tailor the segments to your specific business requirements:
Step 1: Accessing the Settings Menu
Click on the settings icon to open the menu on the right-hand side of the screen. This will provide you with a range of options to choose from.
Step 2: Navigating to Application Settings and Choose a Template
From the menu that appears, select "Application Settings." This will redirect you to a new window specifically designed for managing templates. Here, click on "Add Segment" to proceed with segment customization. Choose the template that you would like to customize from the available options.
Step 3: Choosing to Customize the Template
After selecting the desired template, a new menu will open, presenting you with two options: customizing the template or simply selecting it. To customize the segments within the template, choose the "Customize Template" option.

Step 4: Renaming and Finalizing the Template
Once you have chosen to customize the template, you will be provided with the opportunity to rename it. Take this chance to give it a name that accurately reflects its purpose. Once you have made the necessary modifications and are satisfied with the changes, select the "Continue" button to finalize and apply the customized template.

Step 5: Adding or Deleting Segments (Optional)
If desired, you can further customize the segments by adding or deleting stages based on your business processes or workflow requirements. This customization allows you to tailor the template segments to match your specific needs.

Step 6: Finalizing the Customization
Once you have completed the customization process, click on the "Continue" button to finalize and save the changes made to the template.
Congratulations! By following these steps, you have successfully customized the segments within your ZONE templates, aligning them with your business requirements.
We hope that this elaboration of the template-changing and segment-customization processes in ZONE has provided you with a clearer understanding. If you have any further questions or require additional assistance, please don't hesitate to reach out to our dedicated support team.